


「注染」How to: Yukata Pt.2 / Chuusen dyeing
※Continued from my previous article / 前回の記事の続きです
To continue the journey of my original yukata let us take a look at the next step:
Fabric dyeing. In this case the traditional Japanese dyeing method called:
伝統的なオリジナル浴衣の旅の続きです。ついに、染めに入ります:
Chuusen (注染)
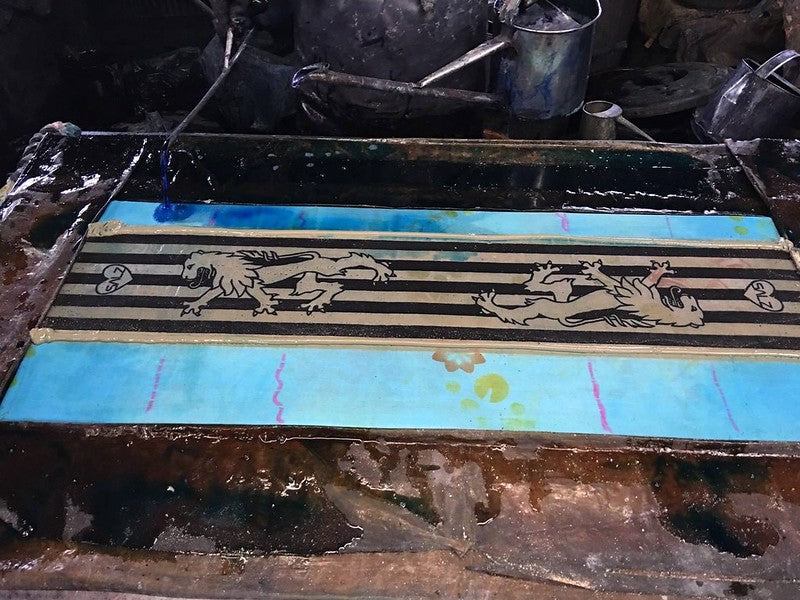
This craft of dyeing has been invented in the Meiji period (1868-1912) in Osaka and is a very practical way of dyeing a long bolt of fabric at once.
My fabric was dyed in Hamamatsu though.
明治時代の大阪で生まれた染め技術「注染(ちゅうせん)」は12mの反物を染めるために便利な方法だそうです。
今回は静岡県浜松市の染め工房さんに染めて頂きました。
The steps look like this:
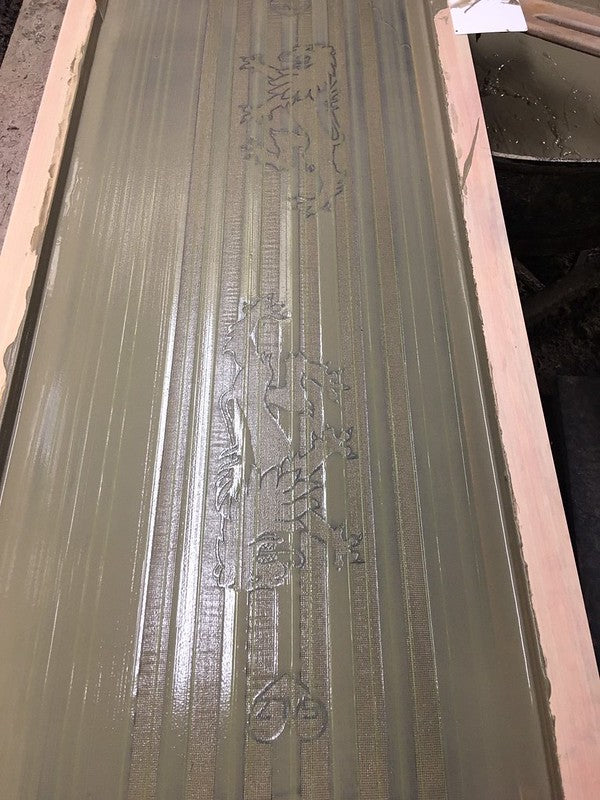
① Adding of paste
For kimono and yukata usually 12 meters of 40 cm wide fabric will be used. In the process of Chuusen dyeing for yukata, white cotton will be laid out on a special table. The previously cut stencil will be placed on top of the fabric and a glue paste will be applied onto the stencil and pulled across. Think of it like silk screen dyeing, just with a paste instead.
Once one meter is done, the stencil will be lifted and more white fabric will be folded on top. In the exact same location (on the fresh fabric) the paste will be added and so on until all 12 meters are continuously full with the paste.
① 糊を乗せる
着物と浴衣の反物は12m × 40cmくらいです。注染の場合は白い綿を使用、特別のテーブルに敷いて、前回彫りました1mくらいの型紙を上に載せます。糊はヘラを使って、型を通して置きます。反物の生地を折って、糊をつぎのレイヤーに置いて、その工程を繰り返します。

② Adding of sawdust
To make the paste firm and well sticking, the other side will be covered in sawdust.
② おがくずをかける
糊を固定するするために生地の裏側におがくずをかけます。どんな木のおがくずなんだろう?
 © https://www.asahisenko.jp
③ More pasting
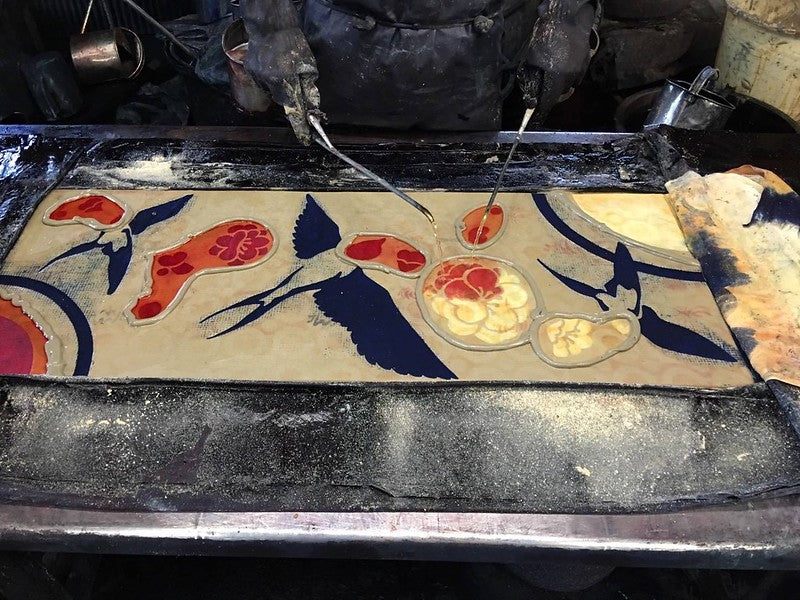
The folded fabric stash will be placed in the dyeing area and a protective cloth placed on top. More paste will be applied like a fence to separate areas from each other which shall be dyed in different colour.
③ 糊の土手
生地は染め用のところに移動、違う色で染めたいところにさらに糊で囲いを作ります。
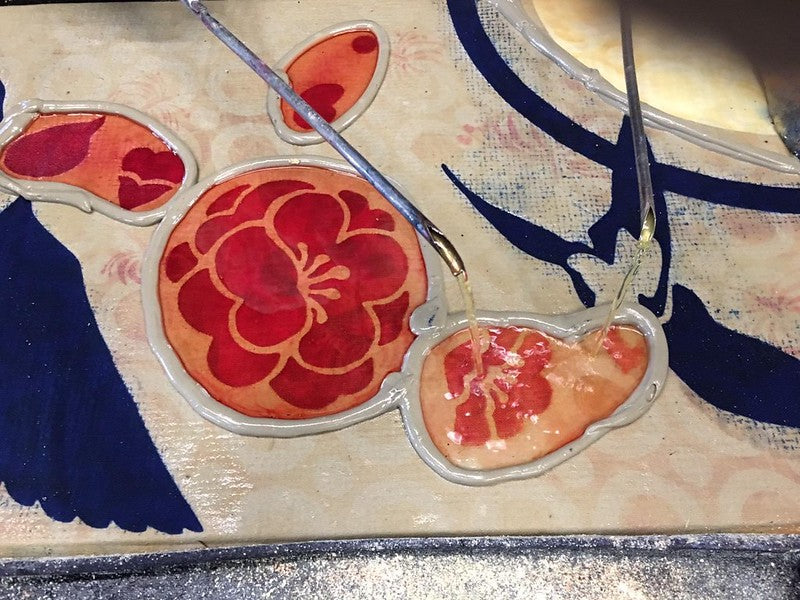
④ Dyeing
Different colours will be mixed and prepared in buckets according to the customers request. The water-like dye will be inserted into some kind of watering cans and poured onto the fabric. With the help of some kind of sucking compression of this special table, the dye will be sucked through and absorbed by all layers.
Dye will be added gradually and sucked through until the preferred colours are achieved.
④ 染める
希望に合わせて色をバケツで作ります。染料をやかんに入れて、生地に注ぎ、コンプレッサーで下から吸入することで全てのレイヤーを通して染めます。染料を何回も足すと色目は濃くなります。

 © https://www.ryokan-yukata.jp
⑤ Rinsing
After the dyeing processed finished, the fabric will be washed (traditionally by hand) to remove the glue paste and rinse out the excess dye to prevent bleeding in the future. Once hand washing is done they will be placed into a several meters long wash basin which has flowing water to imitate a river.
In the old times fabric was always hung into a streaming river for a while to rinse the dye out.
⑤ 水洗い
染めは終わりましたら、反物を水で洗って糊を落とす。その後、長い洗い場で泳がせます。昔は川の水に反物を泳がせたんですが、今は工房の洗い場に変わりました。色とりどりの反物が泳ぐ川もみてみたかったなぁ。時代も変わればやり方もかわるんですね。
 © https://www.chusen.co.jp
⑥ Drying
Once the rinsing is completed, the fabric will be spun into a tumbler to remove the water. Then the long fabric will be hung up high under the roof or outside in the wind to completely dry off
⑥ 乾かす
水洗いのつぎはもちろん乾かすことです。(笑)脱水してからは反物を屋根下又は外に干します。
⑦ Rolling
The fabric then will be ironed I believe and rolled up into a fabric bolt.
⑦ 仕上げ
生地を伸ばしてからロールに巻いて、反物は仕上がります。
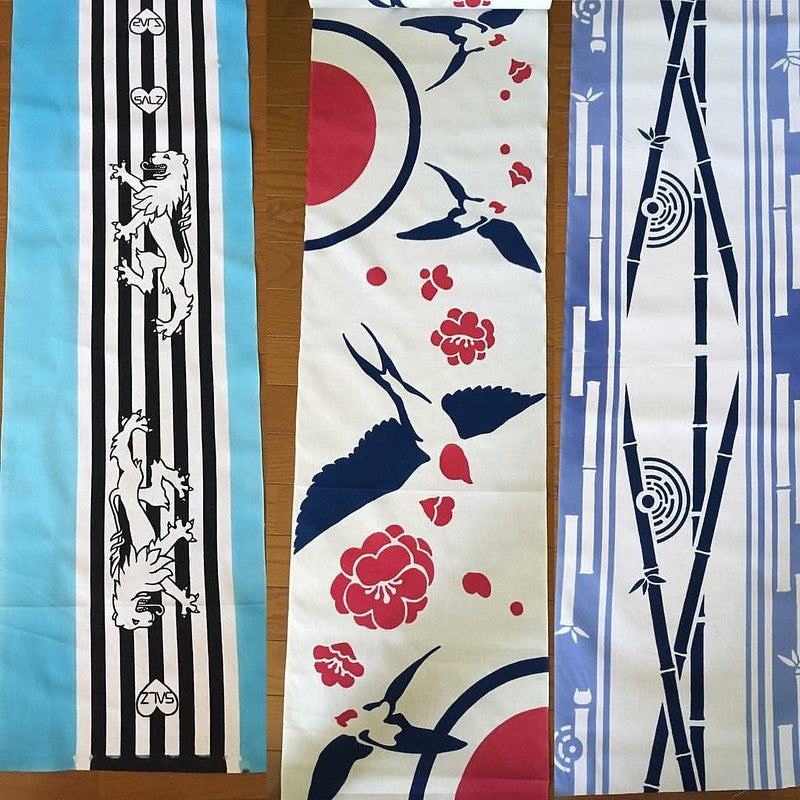
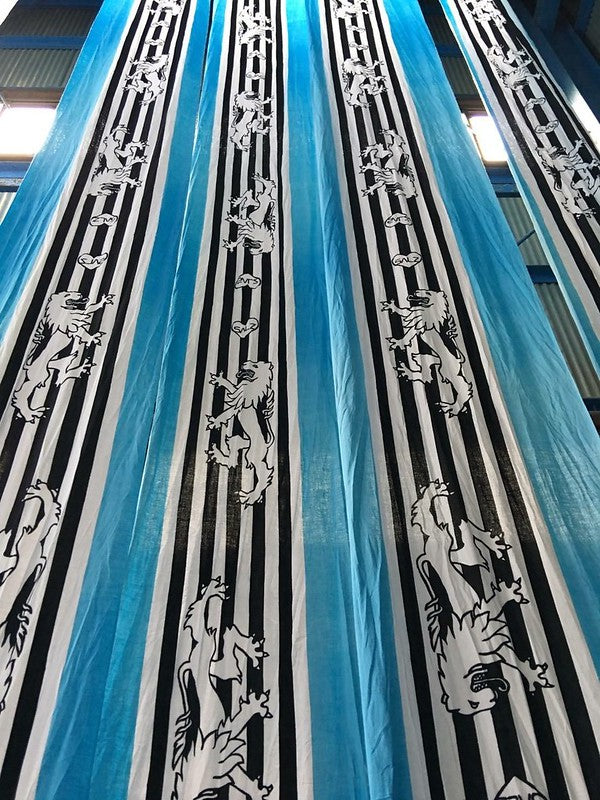
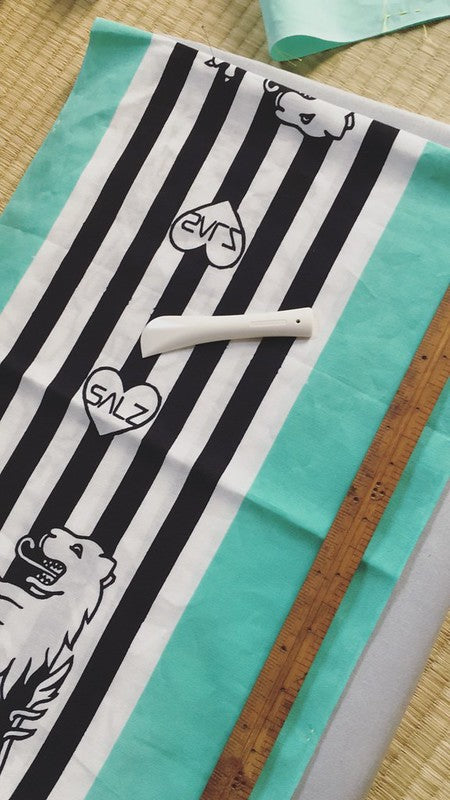
That fabric bolt then landed in my hands.
Unfortunately (as you might have noticed in the pictures) my fabric bolt was dyed in a completely different colour as desired. I am not sure what happened but I gave the data of the colour along with an explanation but instead of teal they dyed a straight blue.
So I had to have my fabric re-dyed and lost another 1 month time..
Finally I got two fabric bolts in the right colour.
残念ながら、今回は希望の色と全然違う色に染めあがってしまいまして・・ 再度染めてもらいました。
しっかりと画像と色の説明もしましたのに、どこで、ミスが起きたのは分かりませんが、さらに一ヶ月後に正しい色の反物を頂きました。主催者さん、浜松の工房の皆さん、なんどもやり取りしてくださって、ありがとうございます。手作業だから難しいことってありますよね。
さぁ、つぎの記事には仕立てのプロセスを紹介します。
Next I will show some pictures from the next step in the making: Sewing!
Best,
Anji
