


「浴衣の型紙」How to: Yukata Pt.1 / Traditional stencil cutting
For a long time I wanted to make my own design kimono or yukata the traditional way.
In April I finally went onto a tiny journey to make this happen.
前から自分でデザインした着物が欲しかった。そして伝統的な技術を味わいながら作品を作る夢がありました。
そして、ついに今年の4月にその夢は現実になった!
Here is my story.
How to: Yukata Part 1 – Japanese stencil cutting
浴衣の作り方:パート1 ー 着物の型紙を彫る
Before departing I found some information about a newly to be opened place where you can cut your own stencil the traditional way. In the old time, main supplier of stencils for all over Japan came from south of Nagoya.
Ise-Katagami (Ise 伊勢 = name of area, Katagami 型紙 = stencil) were famous all over Japan and according to history the main source of this expertise.
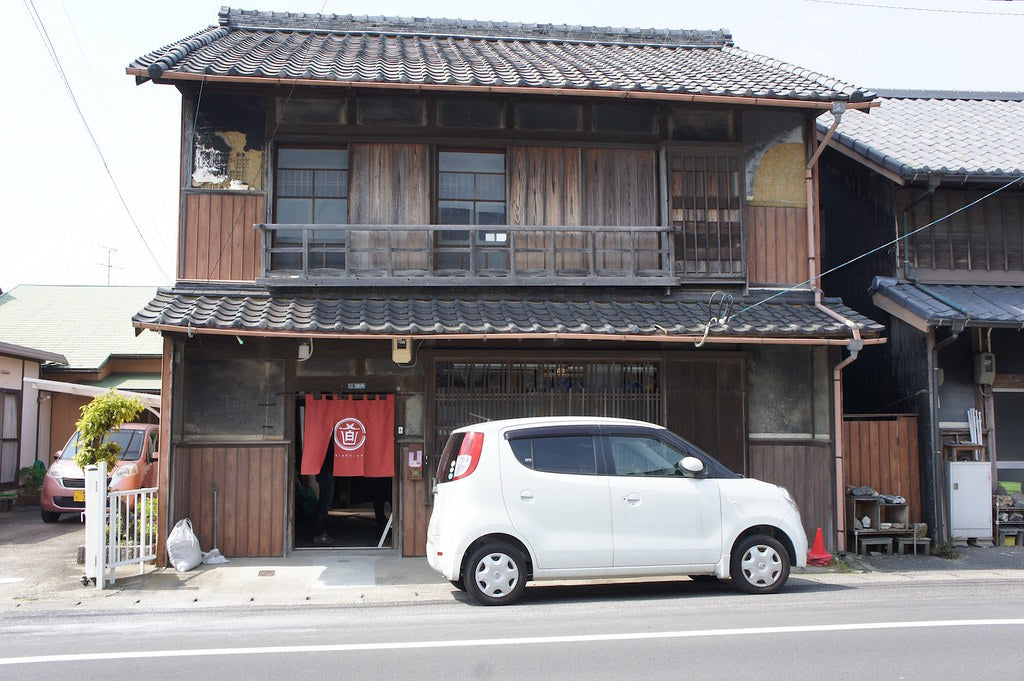
A young man who is partially a stencil cutter (but doesn’t want to dedicate his life to this profession itself) raised money via crowdfunding to rebuild an old house in Shiroko, Mie prefecture into a “stencil cutting guest house” called “Terako-ya”. People can apply to cut their own stencil here under supervision on the weekend and have it dyed traditionally (for a fee of course!).
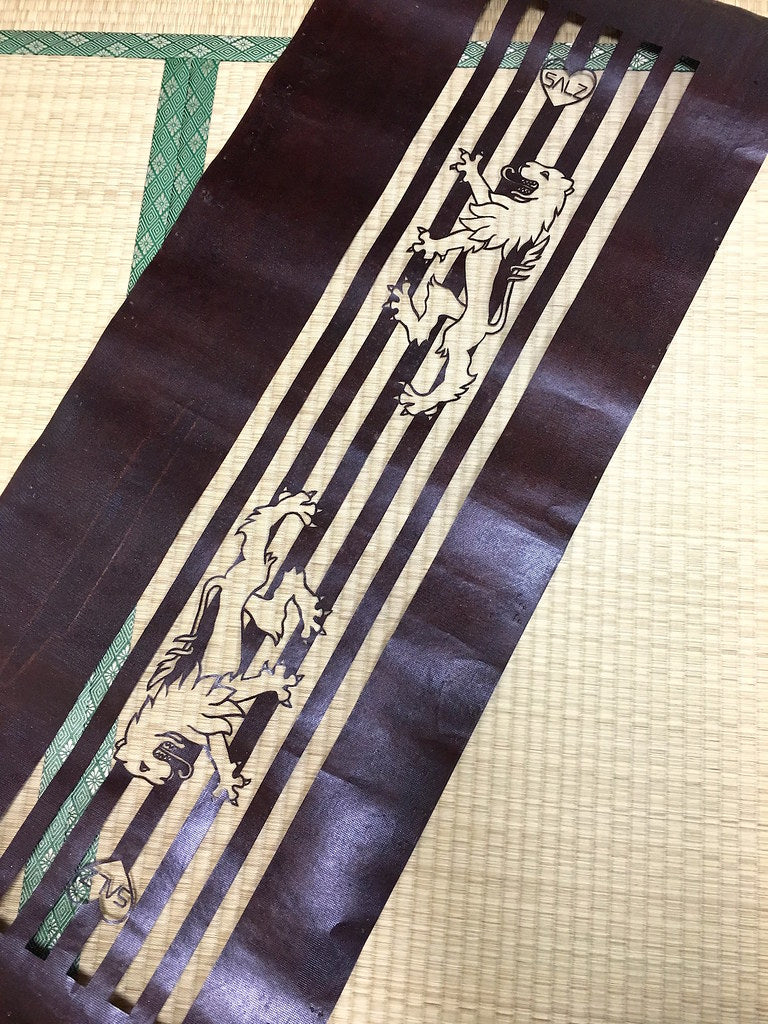
After payments were set, I had to design something (with quite some limitations as to how detailed and how many colours etc..) until the deadline. Even it might not be traditional I drew my design with Adobe Illustrator, because it seemed easier and also you can calculate the exact stencil size perfectly. (1m length and about 40cm wide)
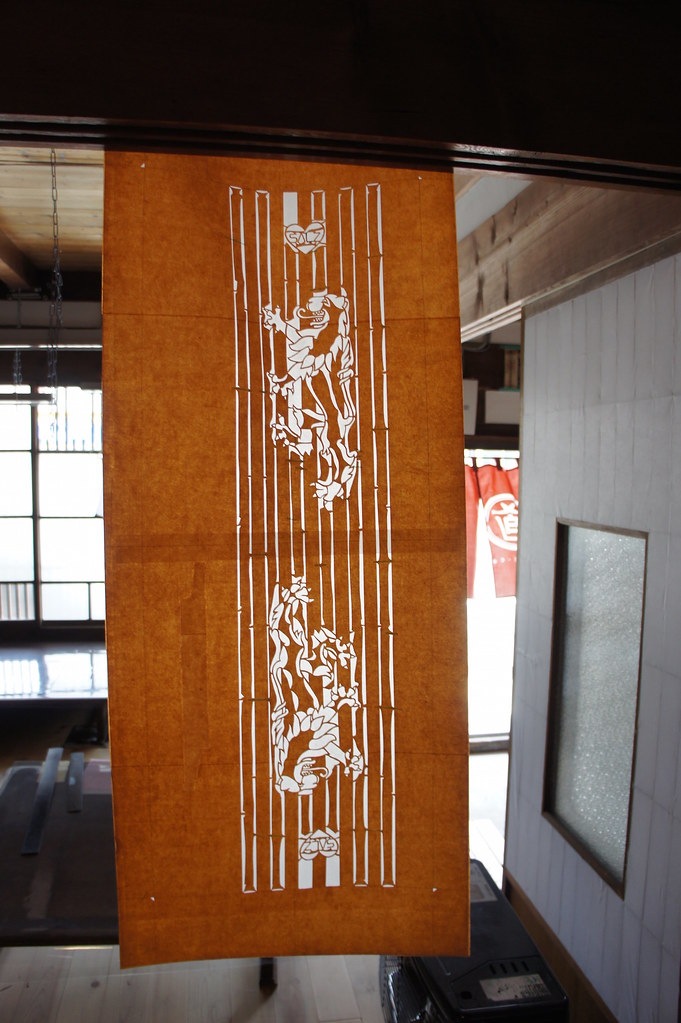
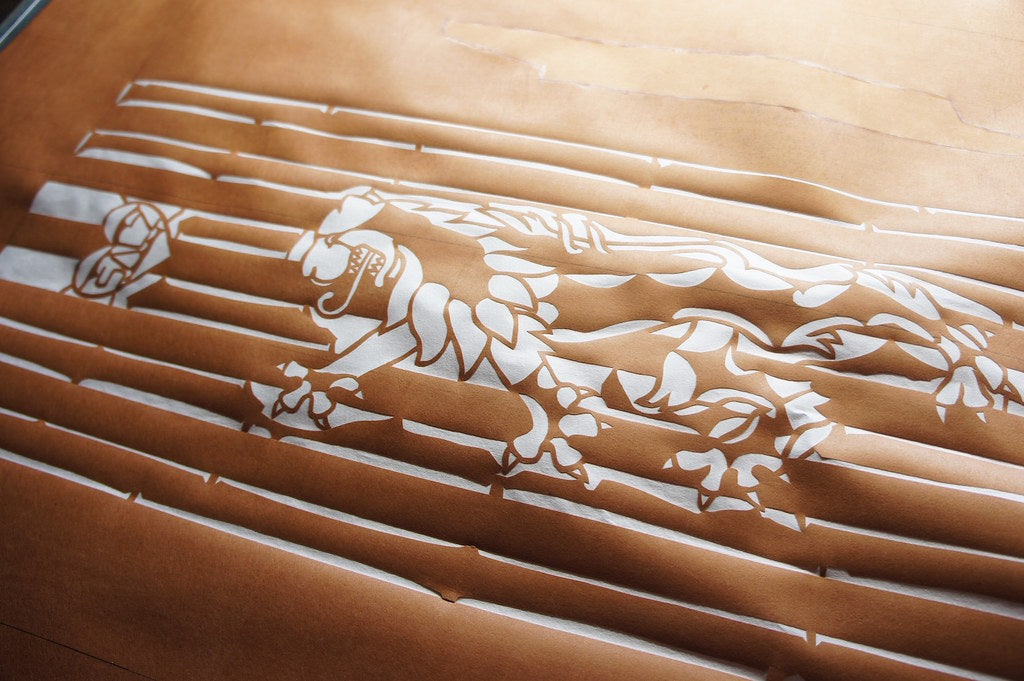
Since this was going to be a very special yukata and all handmade, I wanted it to be very personal. After a little thinking about the design I had the idea to incorporate the “Wappen” aka. coat of arms(?) of my hometown Lüneburg in Northern Germany. This Lion was the animal symbol of Europe’s oldest royal house, the “Welfen” and stands for the homeland Lüneburg. This yukata therefore is showing my German roots while actually being traditional Japanese clothing.
ある日、偶然オンラインの着物グループで見つけたのは伊勢型紙の体験コース。三重(名古屋の南)にある白子と言う所に、昔から日本全国の型紙を彫った職人さんはそこに集まっていたらしいですね。
型紙を修行して2年(?)の若者が、伊勢型紙文化・技術をまもるため、伊勢型紙の体験コースを考え出して、クラウドファンディングでお金を集めました。そして、素敵な古い家をリフォームし、ゲストが泊まれるようにしました。その名も「テラコヤ伊勢型紙」といい、今回は正式のオープン前、一泊二日で浴衣用の型紙を掘るコースに参加させてもらいました。
締め切りまでなんとかデザインを決めないといけなくて、ルールも色々あって(初めてなので、あまり細かいのはダメ、染め色など)少し難しかったです。伝統的ではないのですが、パソコンのイラストソフトを使ってデザインを描いた。手描きだと直しなどは大変ですし、パソコンなら1mx40㎝のデザインをきちんと計算できます。昔は、全部、手描きだったので、調整も難しかったでしょうね。すごいなぁ。
この浴衣は全て手作りで、そして初めてのプロジェクトなので、パーソナルなデザインにしてみたいと思ってました。少し考えた上、北ドイツの生まれ育った街 Lüneburg(リューネブルク)の地域の紋章(ワッペン、今で言うゆるキャラか 笑)を思い出した。昔のヨーロッパである一番大きなロイヤルファミリー(Welfenと言う)の紋章に描かれた動物(ワッペンアニマル)は虎でした。リューネブルクはその家族の拠点であり、現在も街のワッペンとして虎のマークを含めた絵が使われています。
ドイツの歴史アートを日本の伝統的な浴衣に合わせることは今までなさそうでしたので、やってみたいと思ってました。

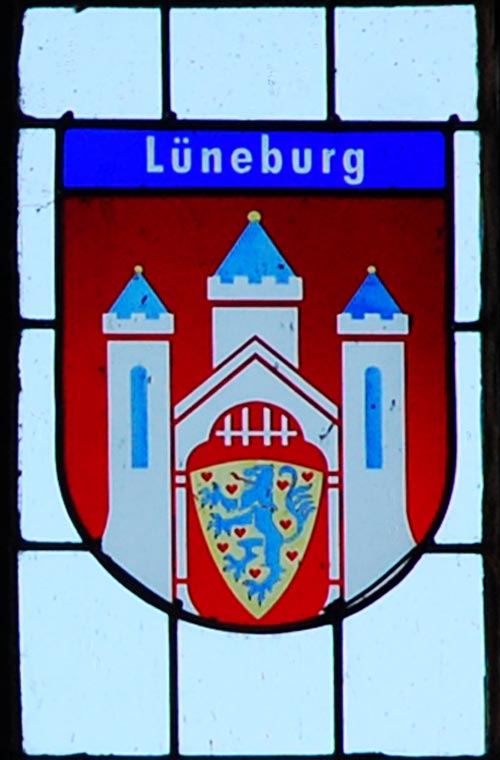 Wappen in a church window
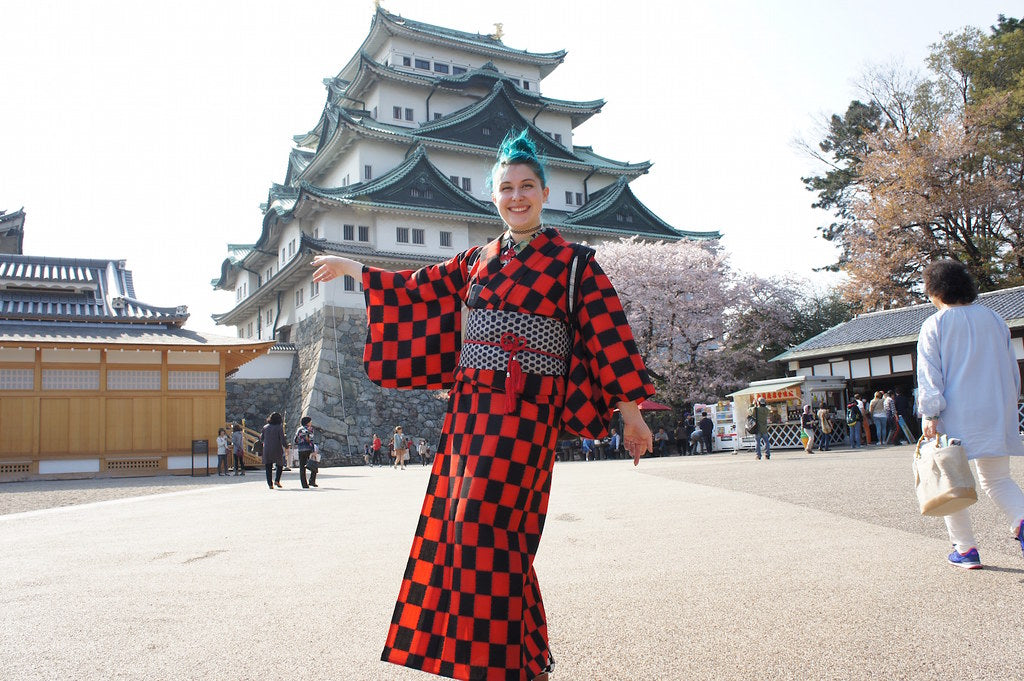
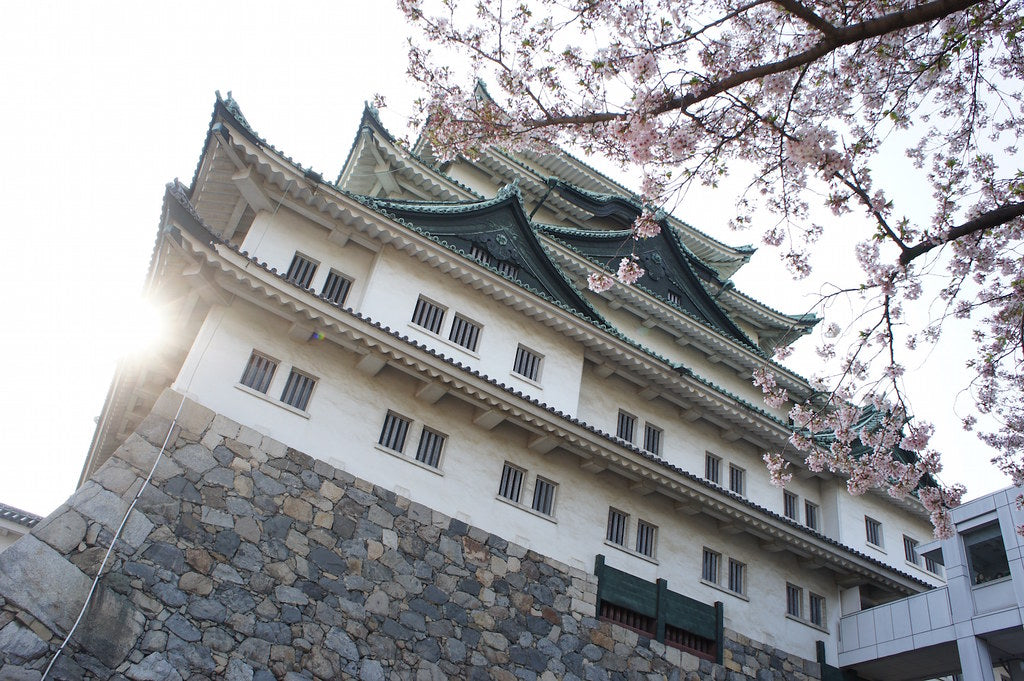
When the time had come I packed a small backpack and headed out to Nagoya. Since I usually always passed through via train I took my time on this trip to head to Nagoya castle and walk a little in the city before changing to the local trains to Shiroko.
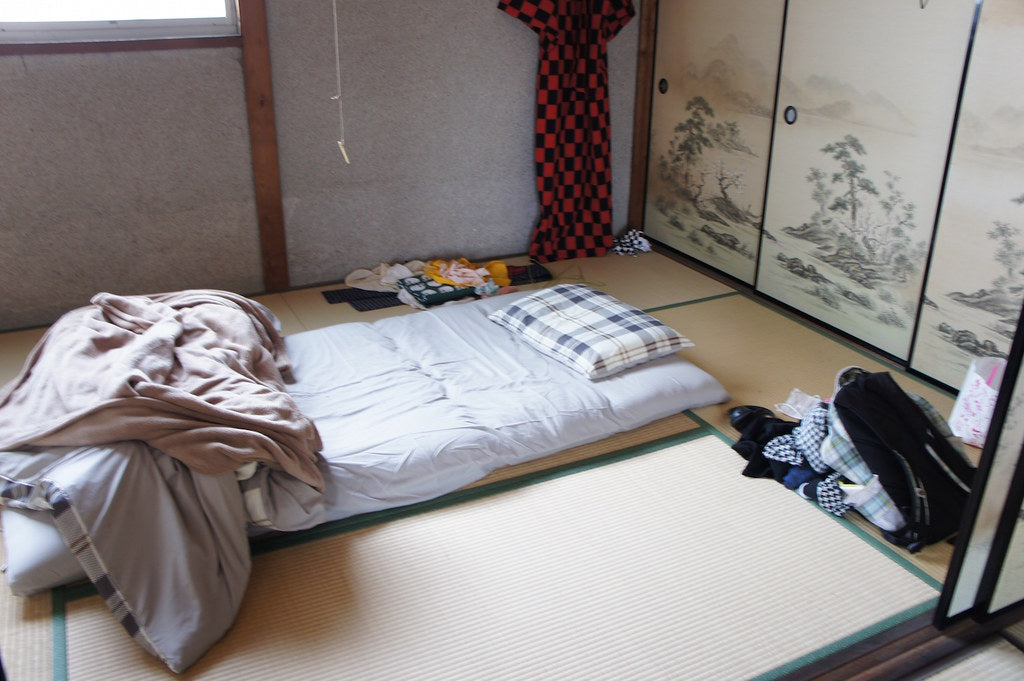
In my case, the house wasn’t officially opened yet and still in testing phase, but I didn’t mind. After dinner we went to a public bath house because the shower wasn’t installed yet (the house still needed some work) and we went to sleep a little too late maybe.
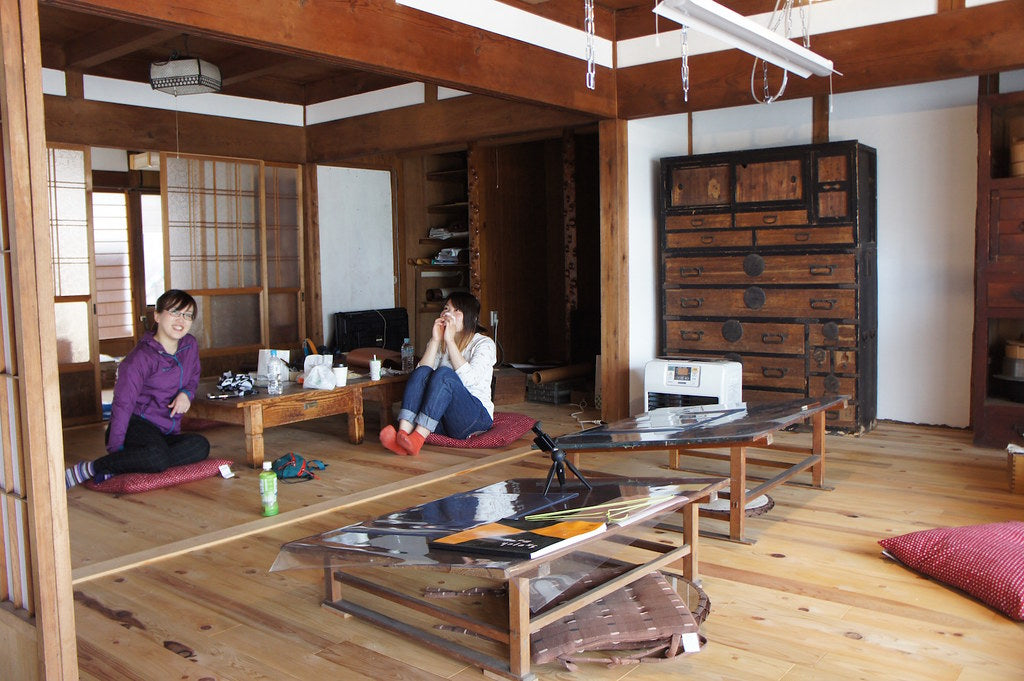
The old house was just lovely. And it was funny how you could hear the conversations of the floor below almost as loud as if they sat next to you.
名古屋はよく新幹線で通り抜けたけど、降りたこと一度もなかった。今回は、白子へ行く前、名古屋城などをちょこっと見てみたかった。浴衣作りに臨む気持ちも、昔の人みたいに洋服なし、三日間着物で行くことにした(まず形からはいる 笑)。大きな荷物は観光にも邪魔なので、ぺちゃんこの帯結びにリュックしてきた。
距離も考え、特別に一日前の夕方から邪魔させてもらいました。リフォーム中の建物のシャワーはまだ完成してなかったため、銭湯へ。
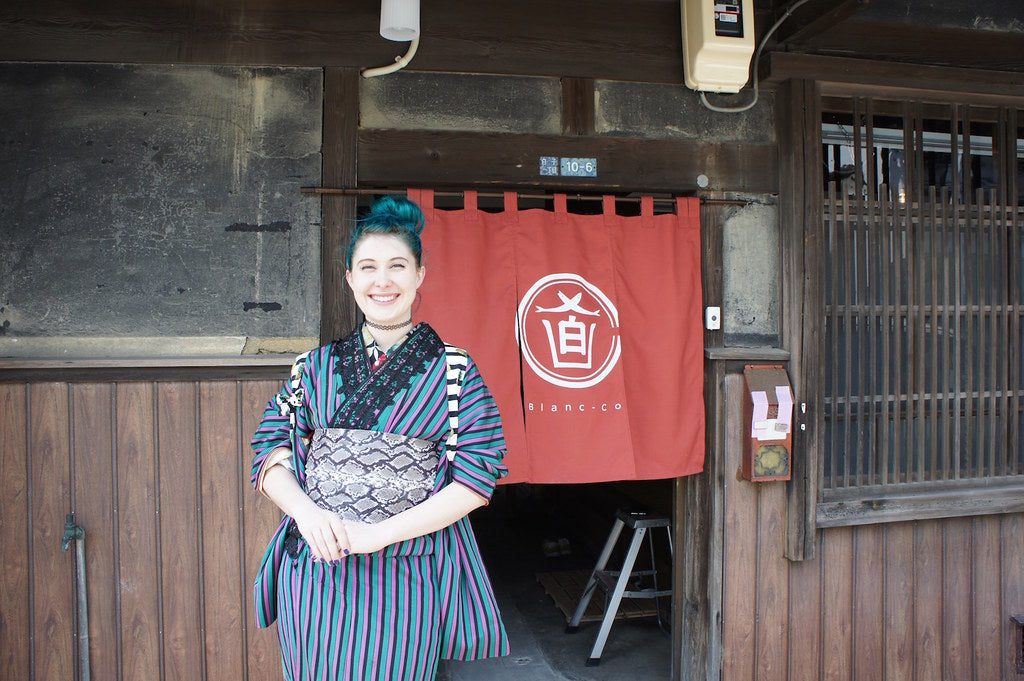
The next morning started early with brushing teeth in the kitchen sink and putting light makeup in front of early guests. (Haha!)
To make this experience proper traditional and worthwhile I did not bring any western clothes and wore casual kimono the entire 3 days.
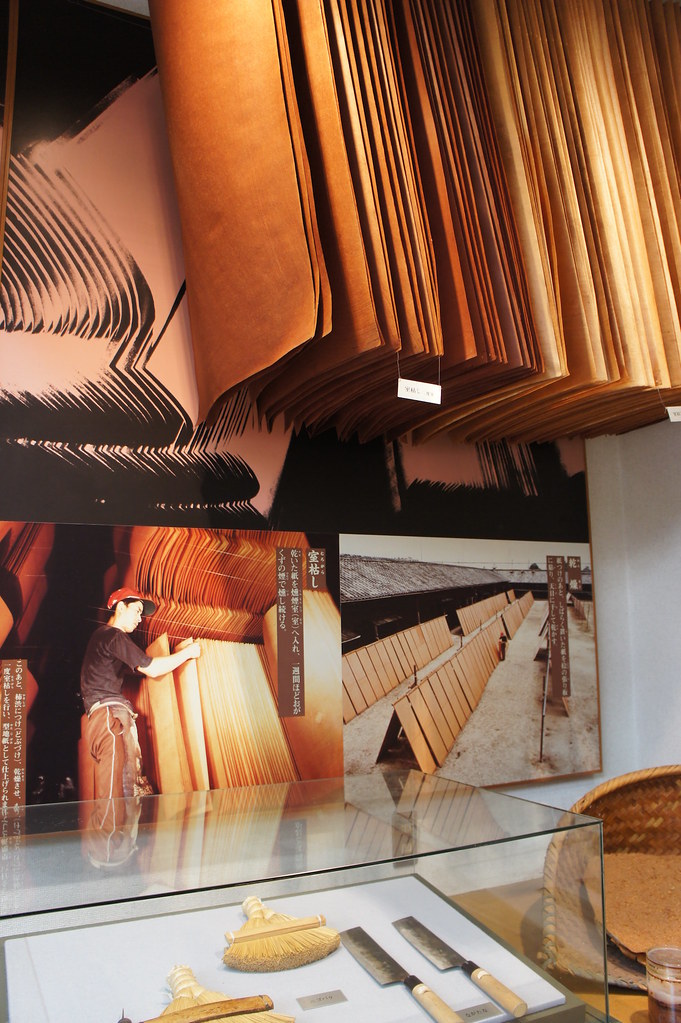
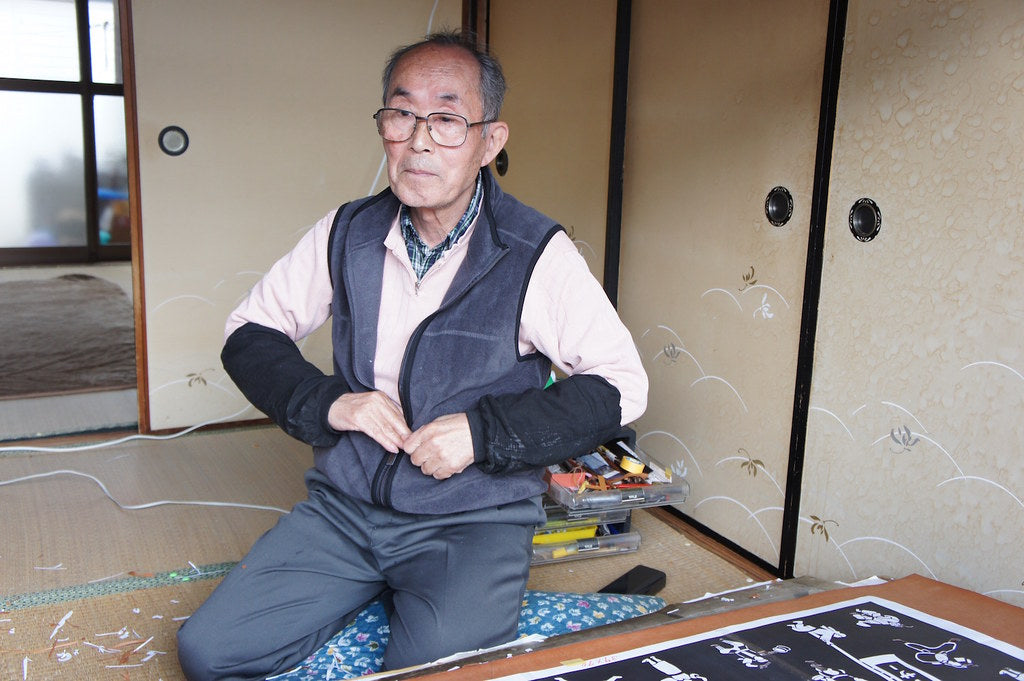
Once all (including me) 3 students gathered, we went to the local museum of stencil cutting to learn a little about the history and techniques before getting started. Also we were able to sneak a peak at a relative of the host who has been a stencil cutter all his life.
翌朝は気持ち的に少し早くきちゃった(笑)眠〜〜い顔をしながらキッチンで歯磨きました。
生徒は私を含めて三人でした。彫る前には近くの美術館で伊勢型紙について色々教えて頂きました。そして主催者の方の親戚、ベテランの型紙職人さんとも軽い話もできて嬉しかった。


Stencil cutting steps:
型紙の作り方:
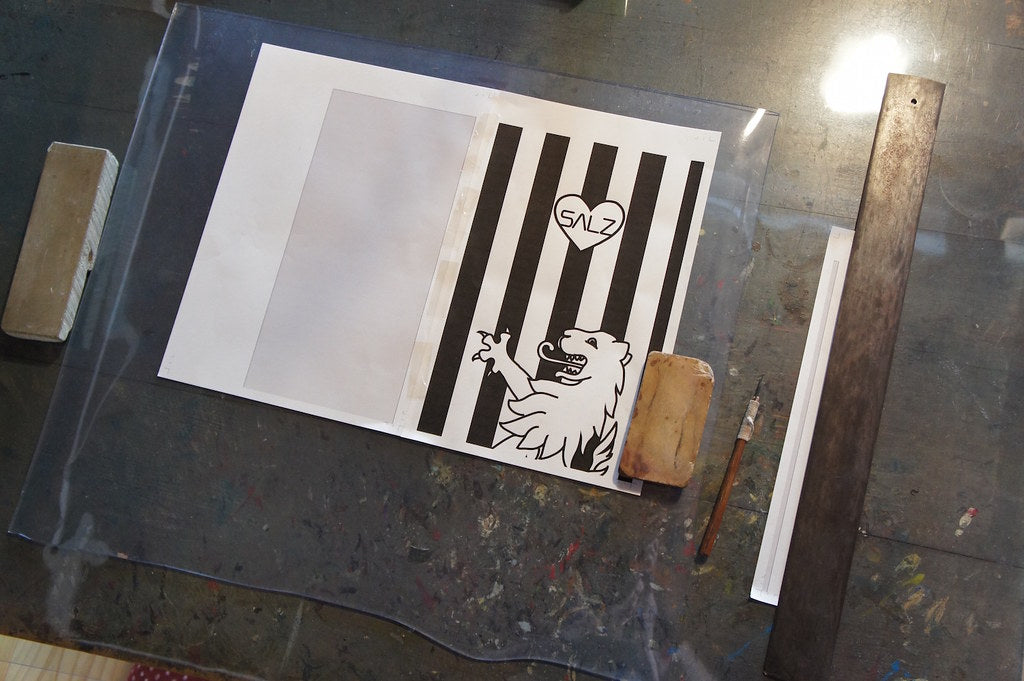
1) Arrange design
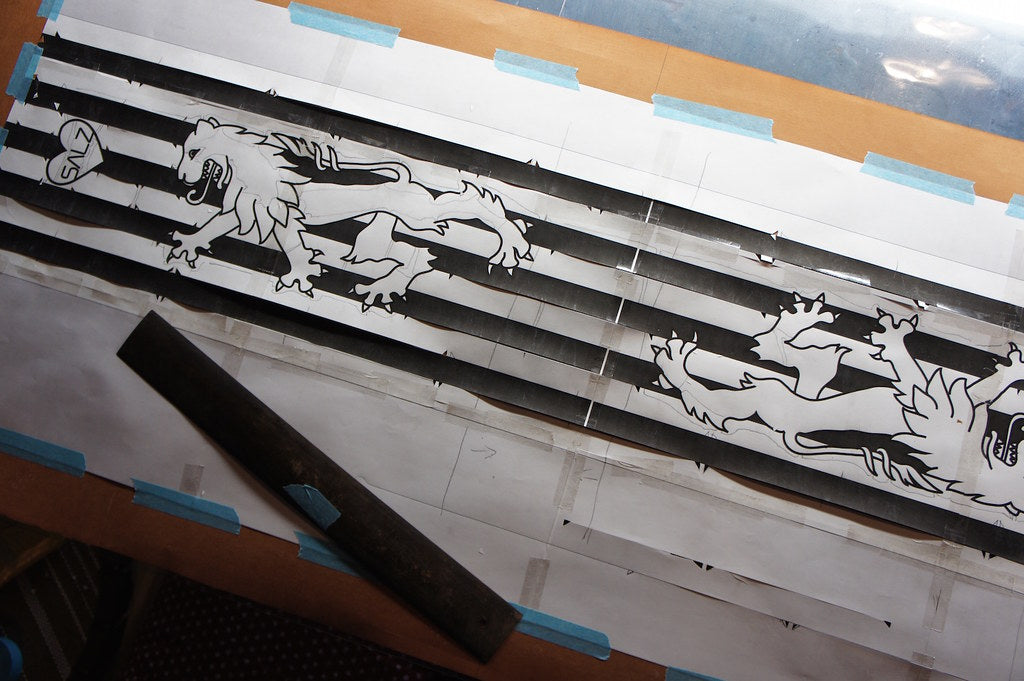
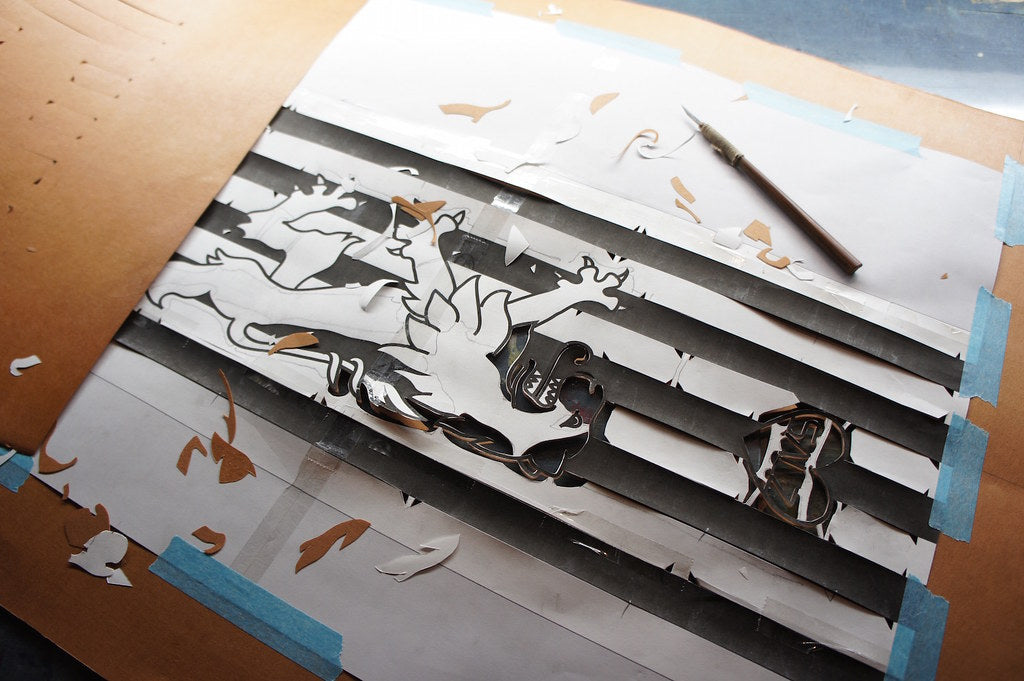
Print out and arrange your design precisely along the marks and tape it together to create the 1 meter long picture.
That was quite a struggle! If you screw up here, the design will look pretty weird when cutting, so I was super nervous. Finally all is taped onto the traditional stencil paper, which is a multi-layered and smoked paper which has been stored and dried for about 8 years.
That is important as it needs to hold up perfectly when going into the dye workshop.
1) デザインの設置
デザインを紙にプリントしてから、矢印を見ながらきちんとデザインのパネルを合わせる。テープで張り付けます。
ここで失敗しちゃう場合、彫るときにデザインが綺麗にできません。とても緊張したわ。
出来上がったデザインを型紙に貼り付けます。
2) Draw bridges
With a pencil you proceed to draw fine lines in your design which will function as bridges when you cut away. If you don’t add bridges and cut long or big areas out, your design may break and wobble around as well as distort in the further processing, so this is quite important.
2) つなぎ目(ブリッジ、橋)を描く
鉛筆でデザインをみながら線で橋のようなのを描く。そのまま全てを彫ると型紙が安定してないし、形は崩れちゃうし、虎の目みたいな部分はどこにも繋がってないので無くしちゃいそうです。
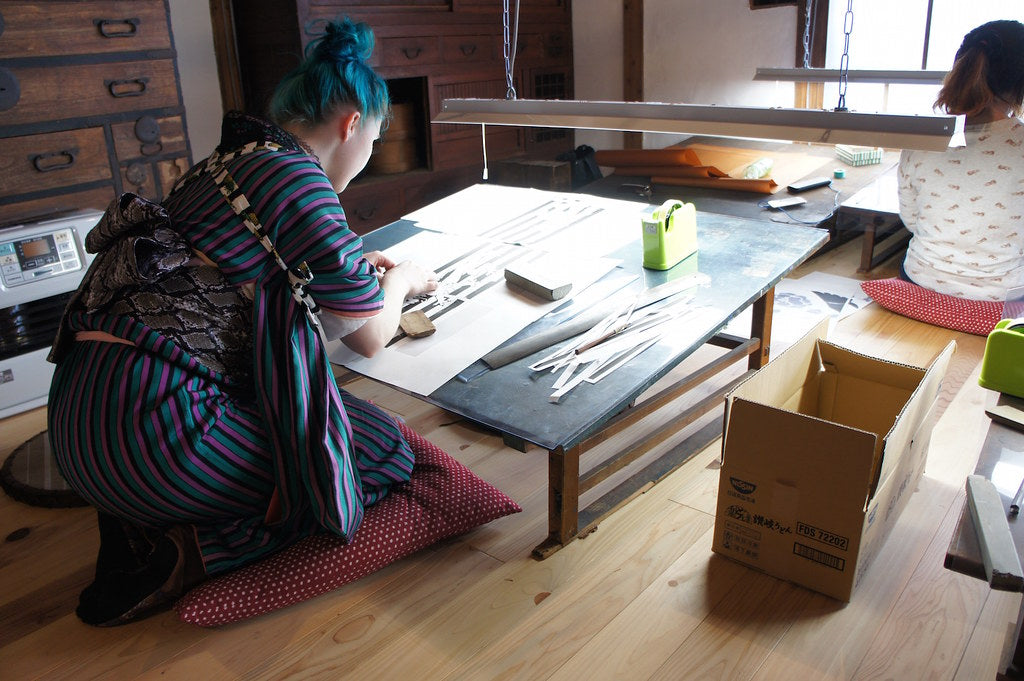
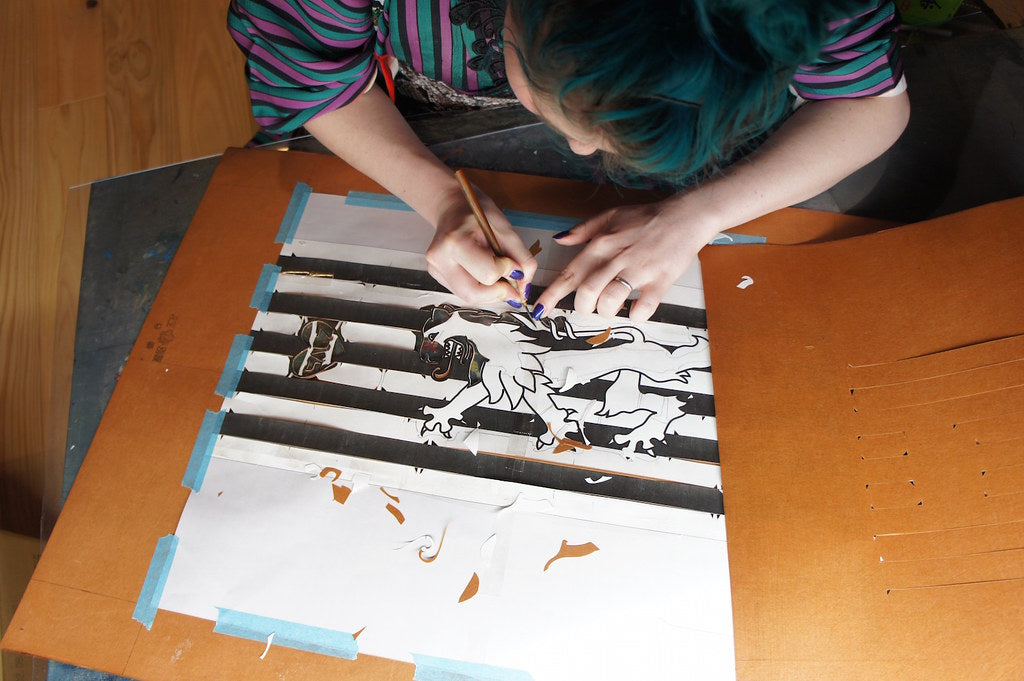
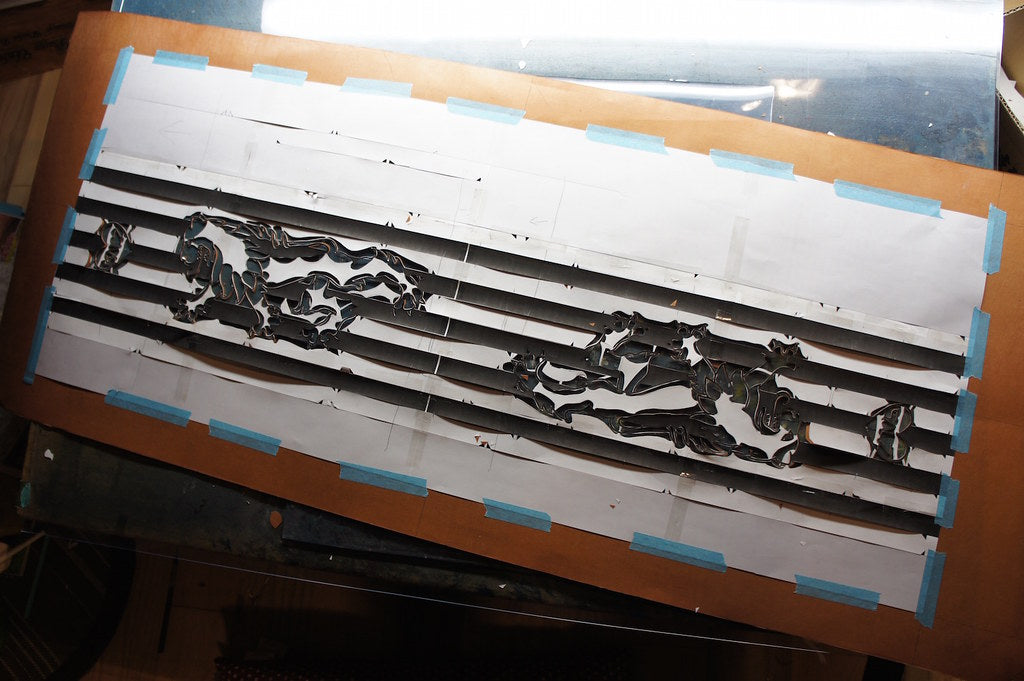
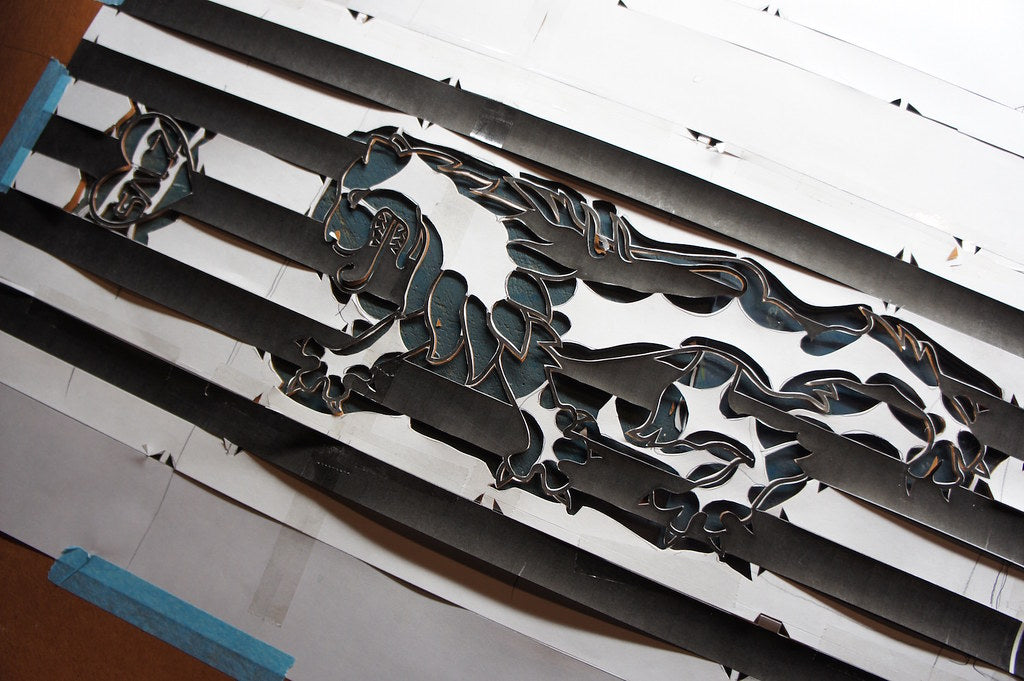
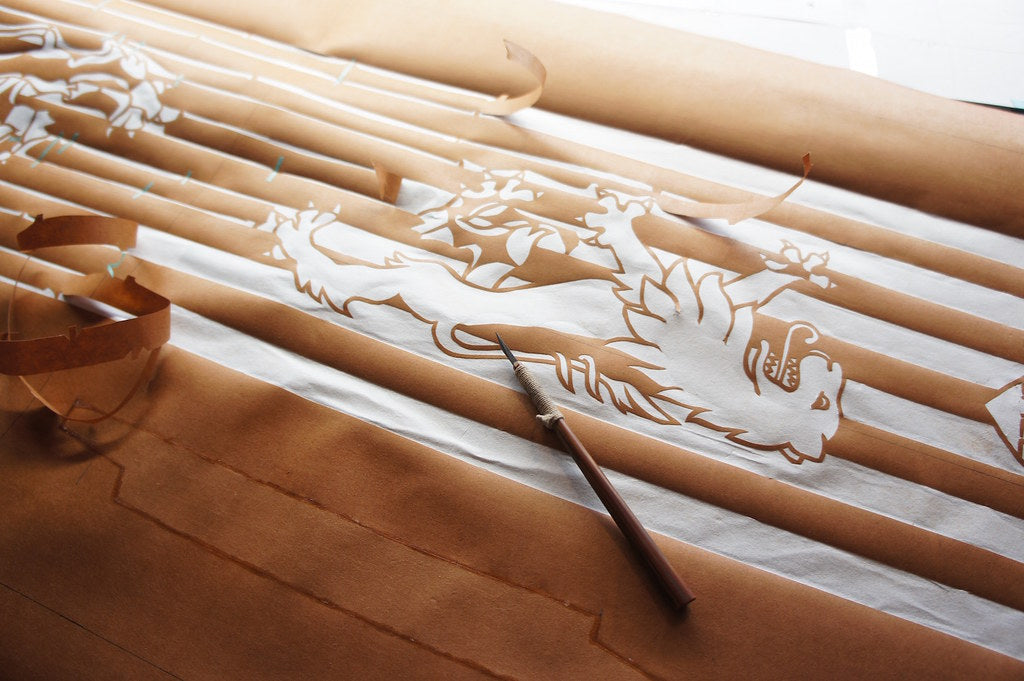
3) Cut
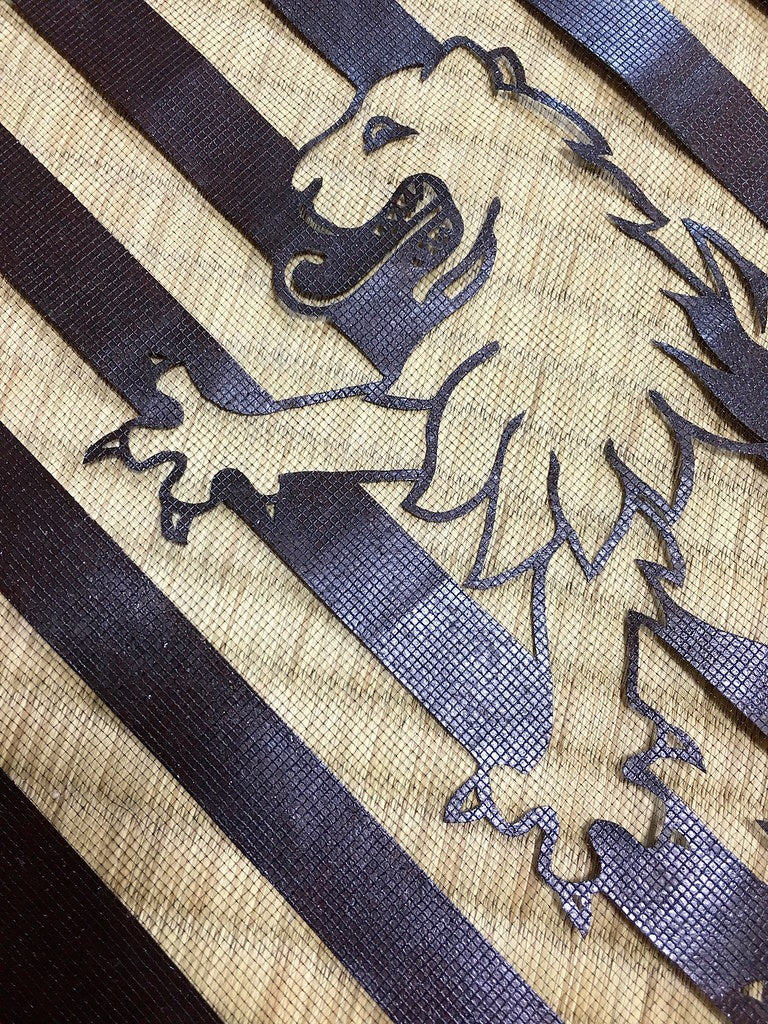
With a cutter knife (Kogatana 小刀) start cutting out your design. Straight long lines may be cut with a ruler, but in general everything is cut free hand in a flowing motion. That gives the stencil and artwork life! The beauty of having a hand made item. You can even alter the design slightly while cutting to give it more taste.
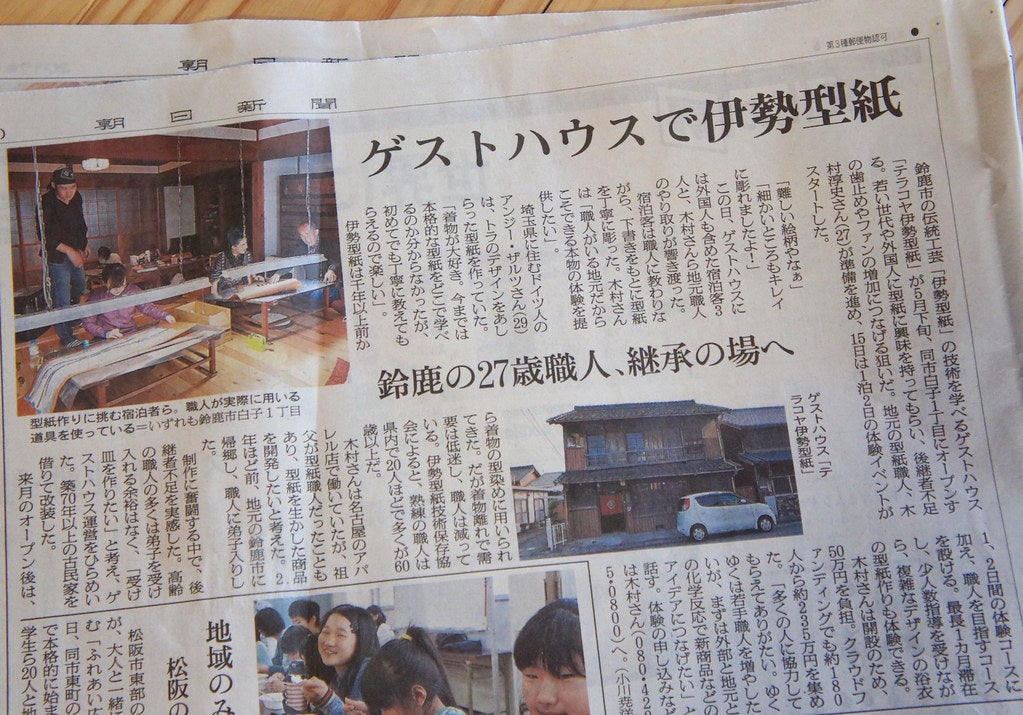
In my case there were a lot of reporters from local newspapers to have a look at the place and craft itself. So they also interviewed us participants and that took quite some time.
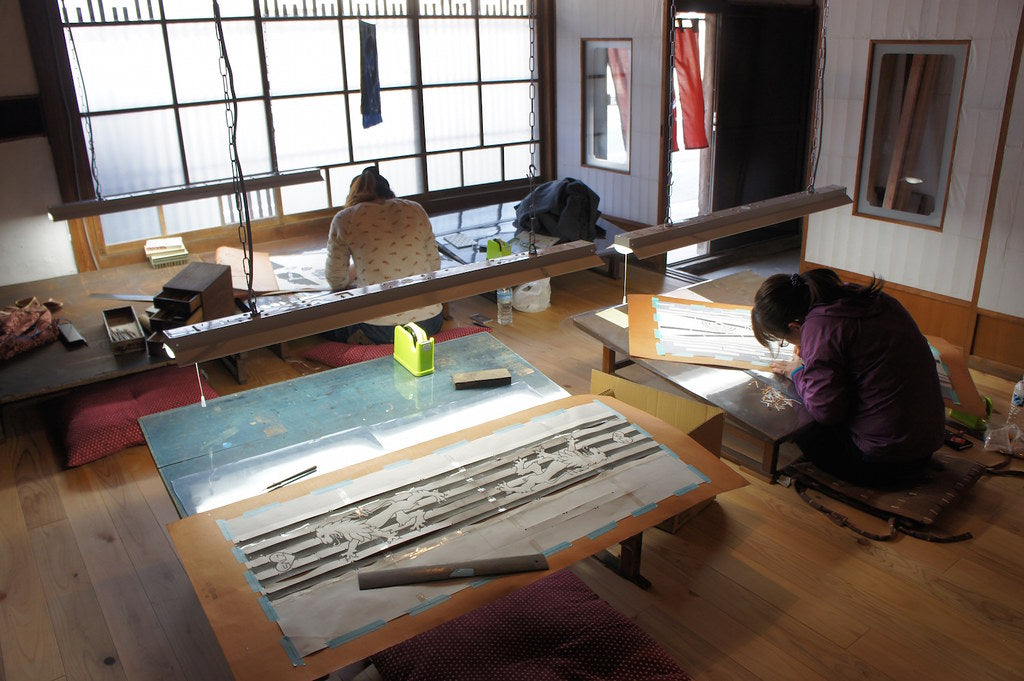
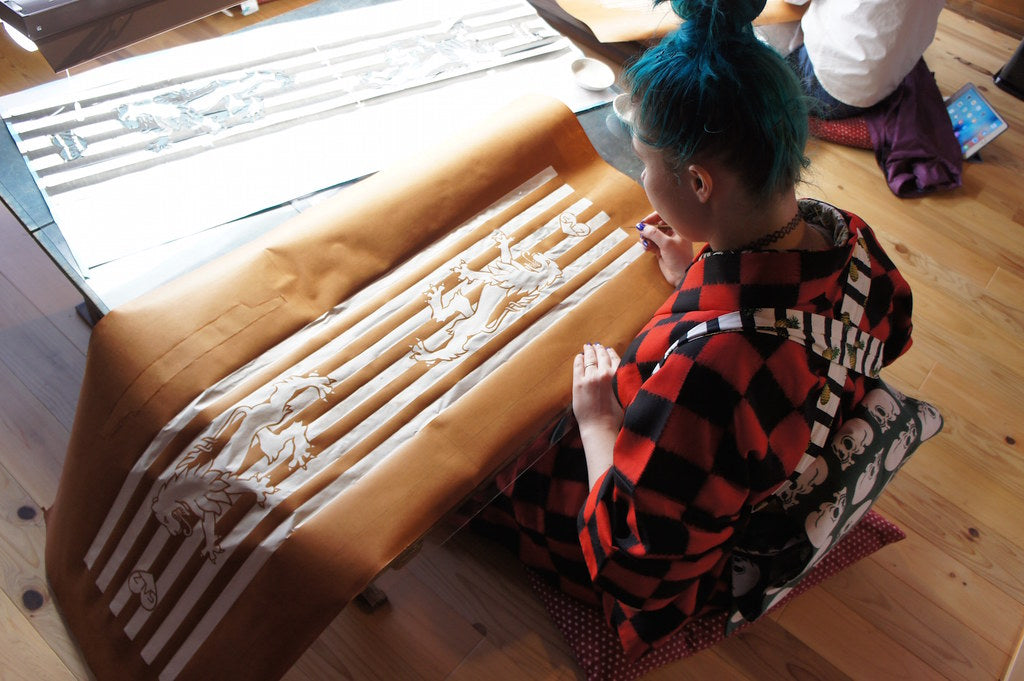
We started around lunch time and when we finally took a break for dinner around 8pm (I did not move one inch away from the desk in these 8 hours!) my cutting process was still far from being done.
After dinner we all went back to work and the other girls finished around midnight. My design however was too detailed and I ended up cutting until 2am in the morning.
You can’t even imagine the pain in my hand and fingers! My fingers were literally numb from pressing the knife too hard and even in the next morning (after very few hours of sleep) I still hadn’t regained my feelings.
3) 彫る
小刀でデザインを切る。長いまっすぐの線は定規みたいなのを使って彫っても大丈夫ですが、基本的には道具を使わずに手で切ります。機械のようにデザインと100%同じに掘らないことで絵が「生き」てきます。それが型紙で彫ることの素晴らしさです。
オープンが近づいてきたので、近くの報道局の方々がたくさんいらっしゃって、主催者と私たち参加者をインタビューして、写真もとりました。お昼にスタートしたが、人の出入りであまり進まなかった気もしました(笑)(後々、新聞に掲載されたのは嬉しかったけどね)
まず休憩なしで夜の8時まで彫って、ごはん食べに行ってからまたすぐ戻った。もう二人方々のデザインは夜中の0時に出来上がったけど、私のデザインは細くて朝2時までかかってしまいました。もう手と指が痛くて痛くて・・指先の感触がなくなっちゃいました。
5時間くらい寝てたかな?起きても、まだ指は治ってなかったです。力入れすぎたかも。
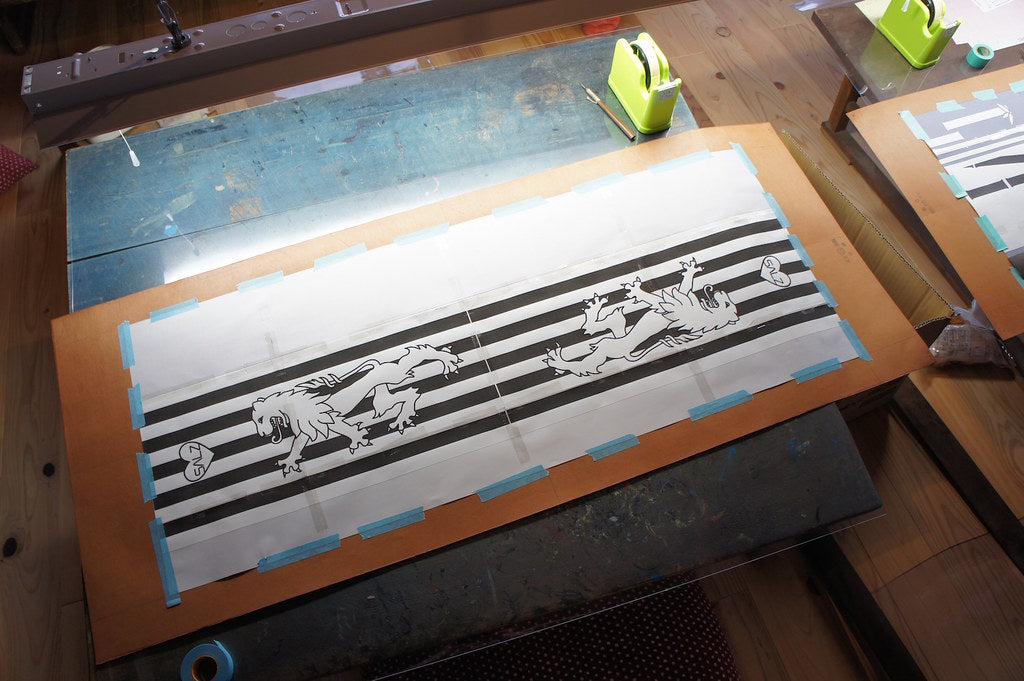
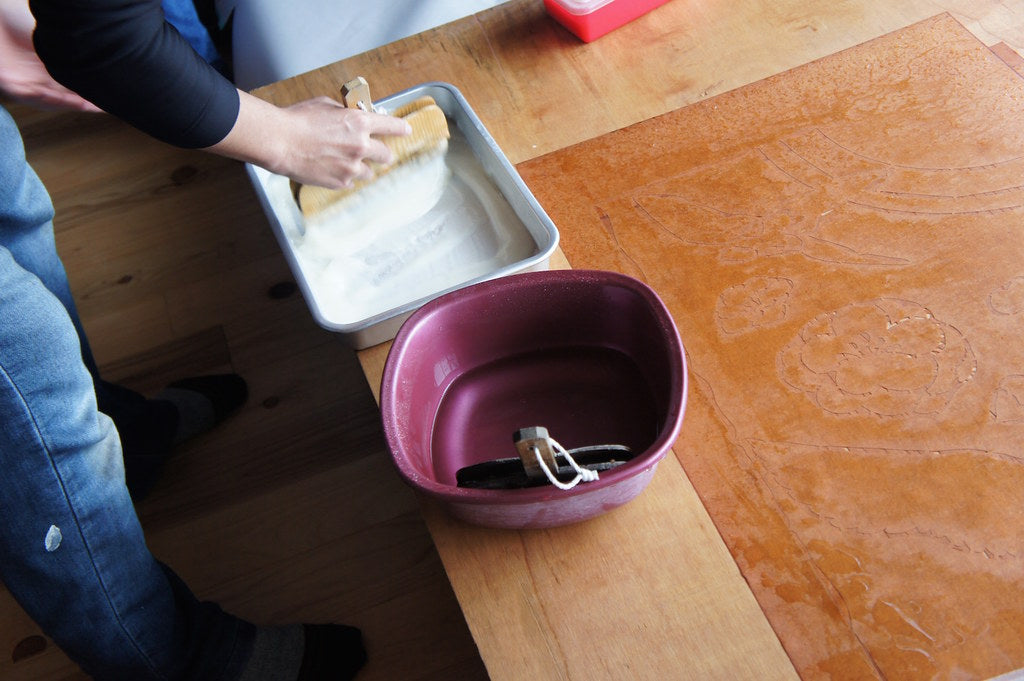
4) Add paper backing
Early in the morning when I came down to brush my teeth, everyone was already back into work mode. The next step is to add a thin white paper to the back of the stencil by some home-made starch glue. It looked a bit like installing wallpaper or flyers.
The stencil then got hung to dry and we proceeded to get some breakfast and walk a little through town.
4) 紙を貼る
まだちゃんと着替えてない朝、皆さんはもう次の作業に入りました。型紙を濡らし、薄い紙を裏に貼り付ける作業です。
白いペイストの中身がなんだったか忘れてしまいました・・スターチとか?秘密かもしれませんね 笑
終わったら型紙を干して、乾かすのを待ちました。そのうち、白子の街を歩きまわって、朝ごはんもゲット。ちなみに、ふぐの白子とかあるけど、この白子という地名はなにに由来するんでしょうね?
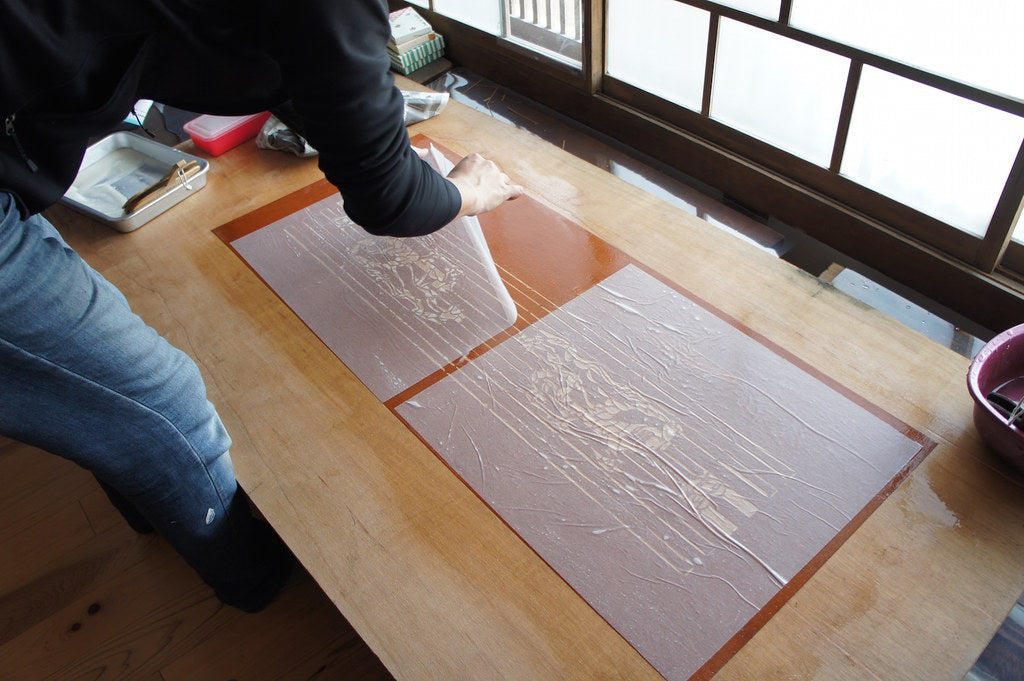
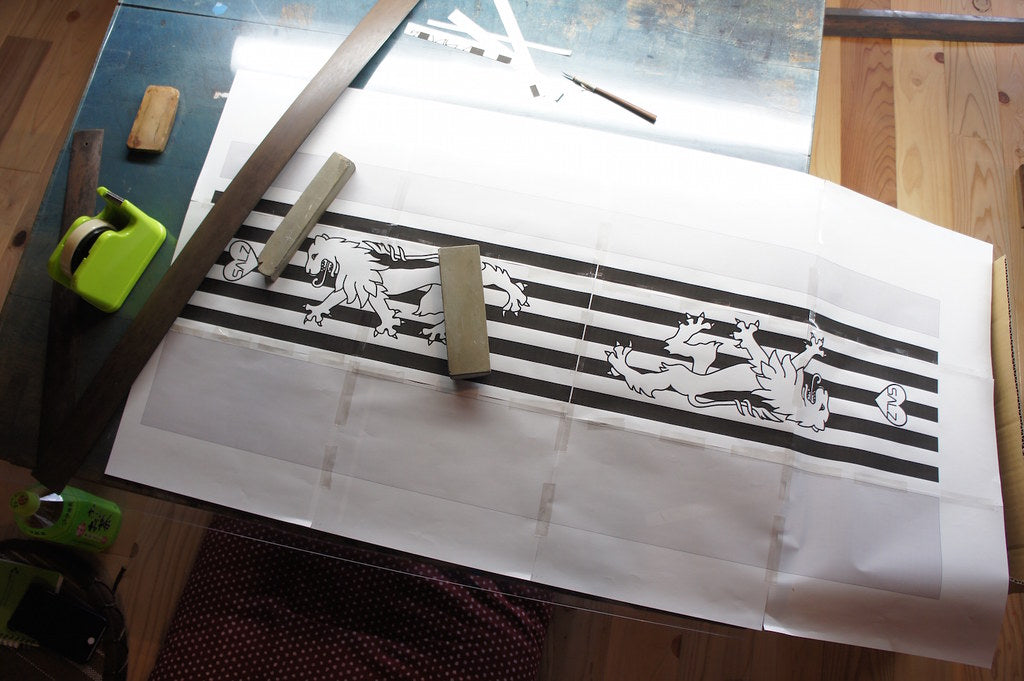
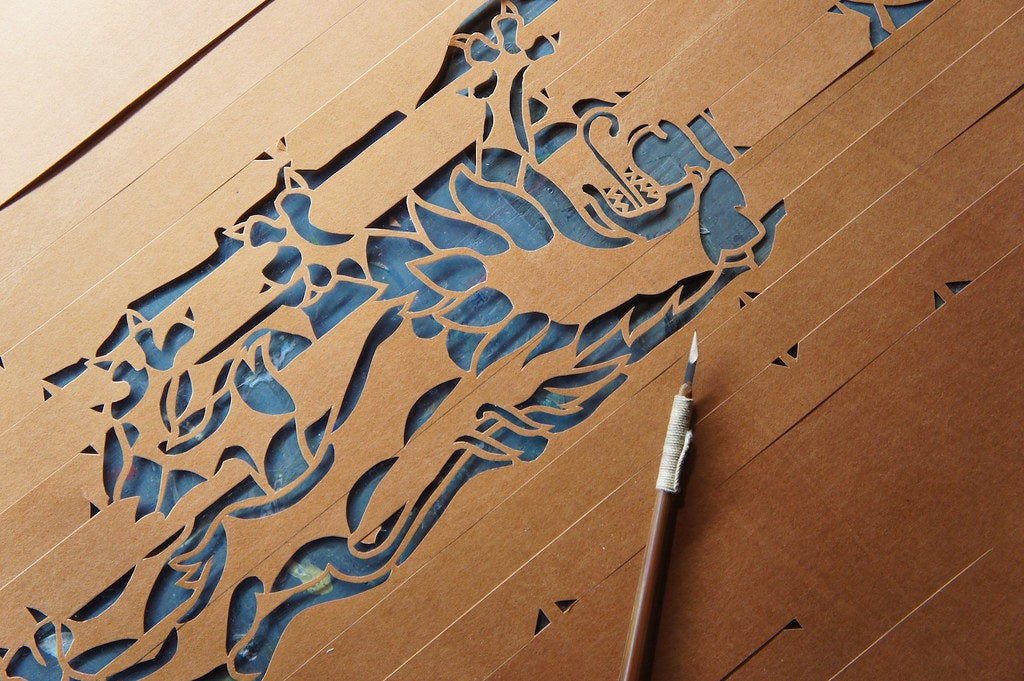
5) Cut
Once the stencil paper combo dried we got back to our cutting tables and cut away the bridges we left, to reveal the complete design. Now is the time to still clean up the design and get everything right.
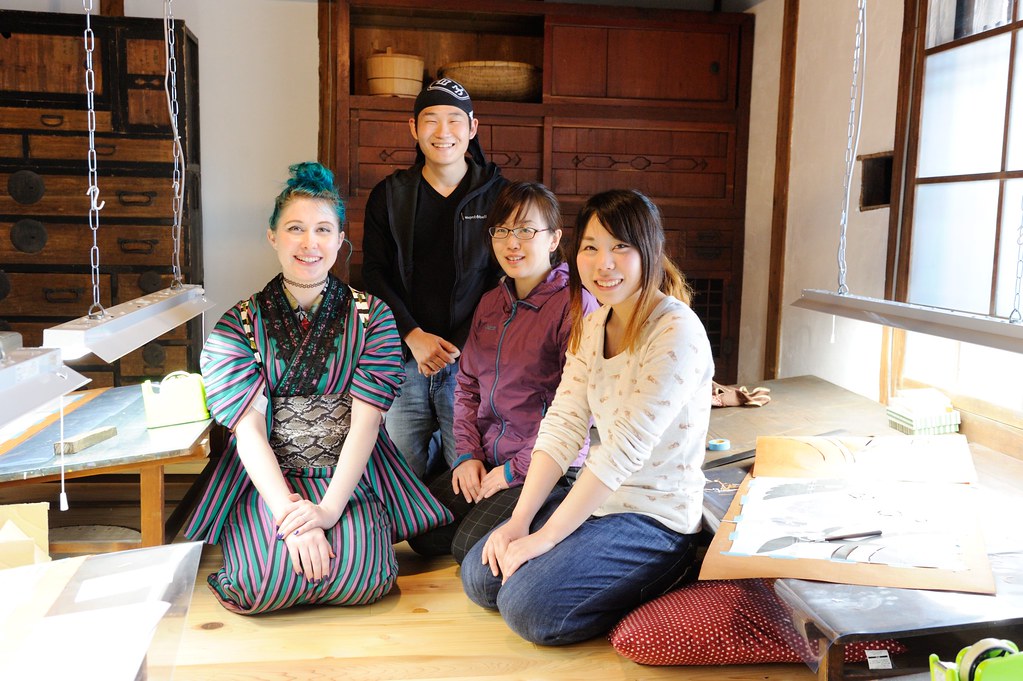
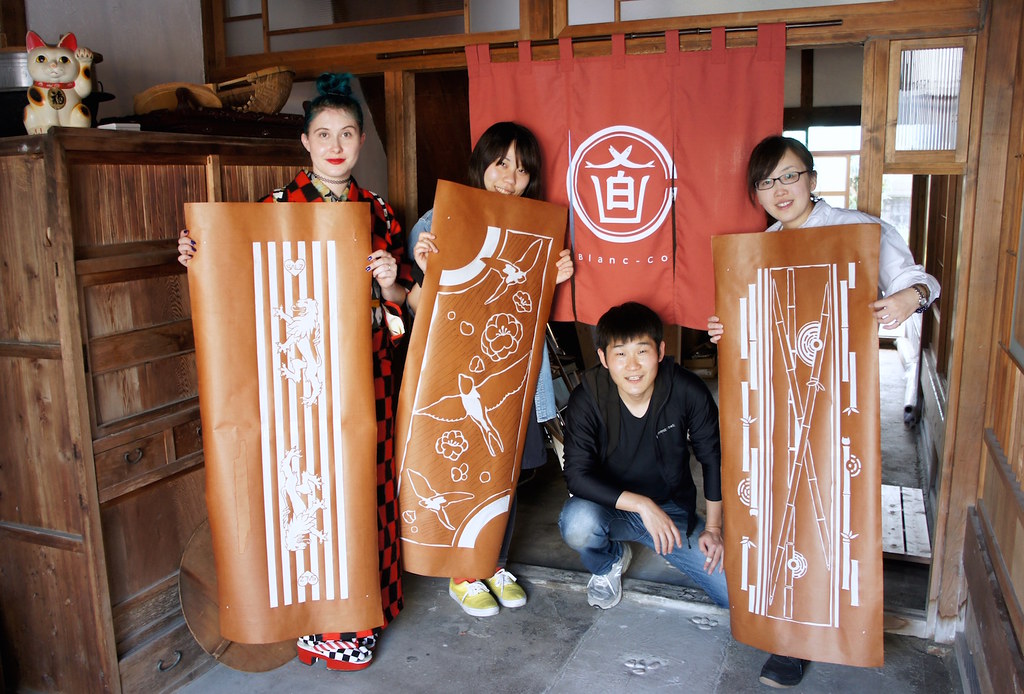
After these few hours of additional cutting my job ended here. We took a picture together before getting back on the road towards home.
5) 掘る
型紙はちゃんと乾かしてから、また彫らないといけません。残していたつなぎ目ブリッジはこのタイミングで綺麗に切り抜き、完成します。
最後に集合写真!皆さん、お疲れ様でした!楽しかったです!辛抱強くサポートしてくださって感謝です♡
On my way home the whole experience sank in and I suddenly felt so moved that I had to cry.
All the preparation and work I poured into this. How scared I was to screw everything up with one wrong cut! How beautiful it was to experience this tradition first hand and create something with my own hands!
帰り道、これまでの睡眠不足で一生懸命やった作業が終わり、静かになって、二日間の経験を思い出して、幸せの涙が落ちてきた・・
準備するの長い時間、失敗するの怖さ(一度違うところを切っちゃうと終わりとのこと)そして伝統的な技術を学んで、自分の手で作品を作るの感動でした。
(家に帰ってきてから、グッスリ寝れました 笑)
6) Add silk mesh
This step requires a highly skilled professional and was done by a specialist in the area.
On top of the stencil a fine mesh of sha (紗) silk is added with some special glue and the whole paper is treated to make it non-absorbant and stiff. The white paper is then removed and the cut out lines are visually “floating” on the mesh.
Now the stencil is finished for traditional dyeing.
6) 紗張り
この作業はとても難しいみたいですので、ベテランの紗張り専門家に頼むことになった。
型紙の上に絹の紗を貼り付け、紙を全体的にコーティングしてます。なんのコーティングは残念ながら分かりません。最後に白い紙をとってから型紙は完成、染め工房に送ることができます。
In the next post I will explain about the dyeing process, so keep an eye out.
さて、次の記事は注染について書きます☆
Love,
Anji
